fivethirty at home: distressed finish using Jolie paints
fivethirty at home: smooth finish using Jolie paints
fivethirty at home: painting glass and mirrors
before and after: custom color on side table
Equal parts Jolie Moroccan Clay and Pure White combine to create a soft coral. We used clear wax to finish.

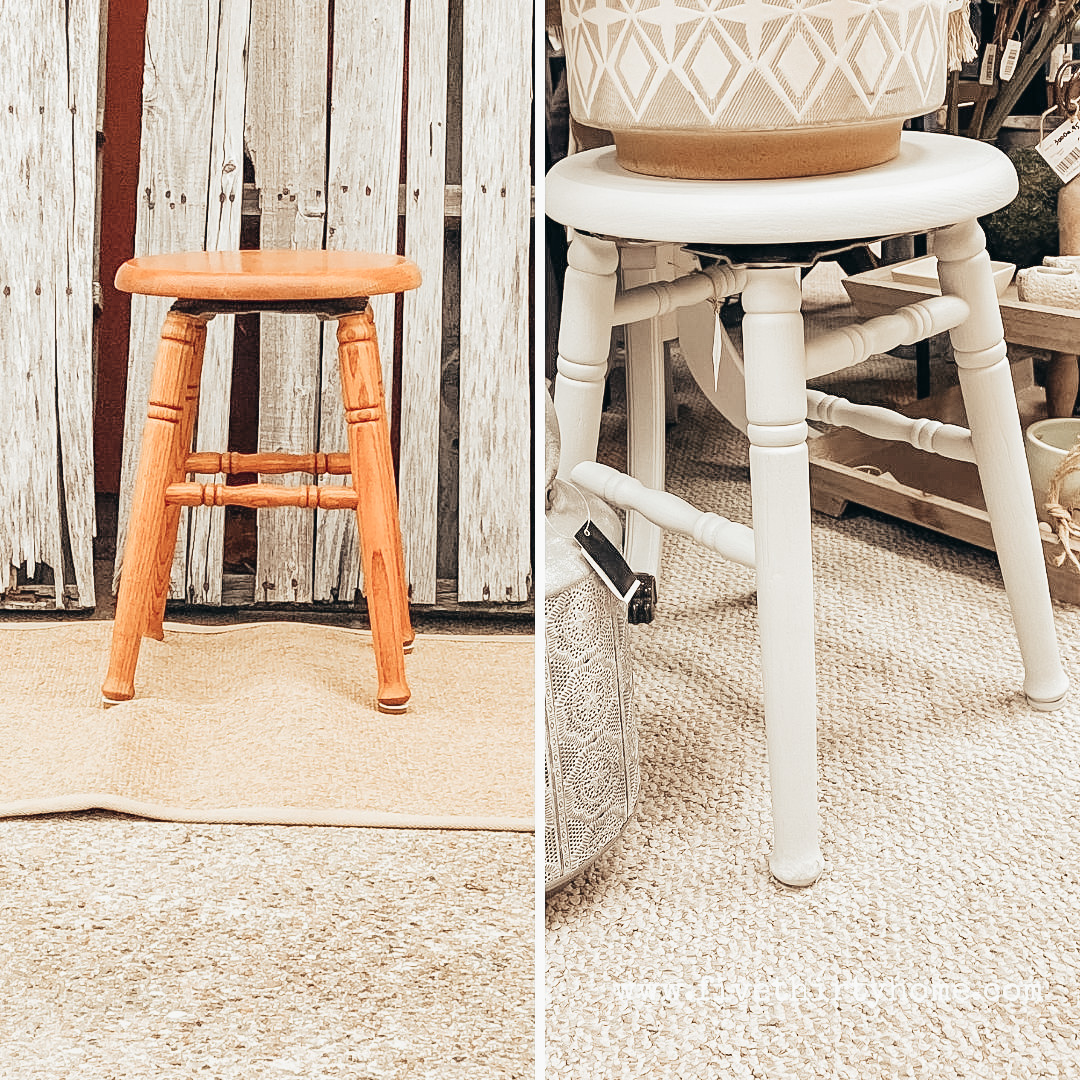
year of jolie: stool in uptown ecru before and after
We decided we like the color of the legs on this piece but not the crusty, metal accents. Luck for us, Jolie Paint works perfectly over metal also! A couple of coats or paint and wax and it looks so much better!
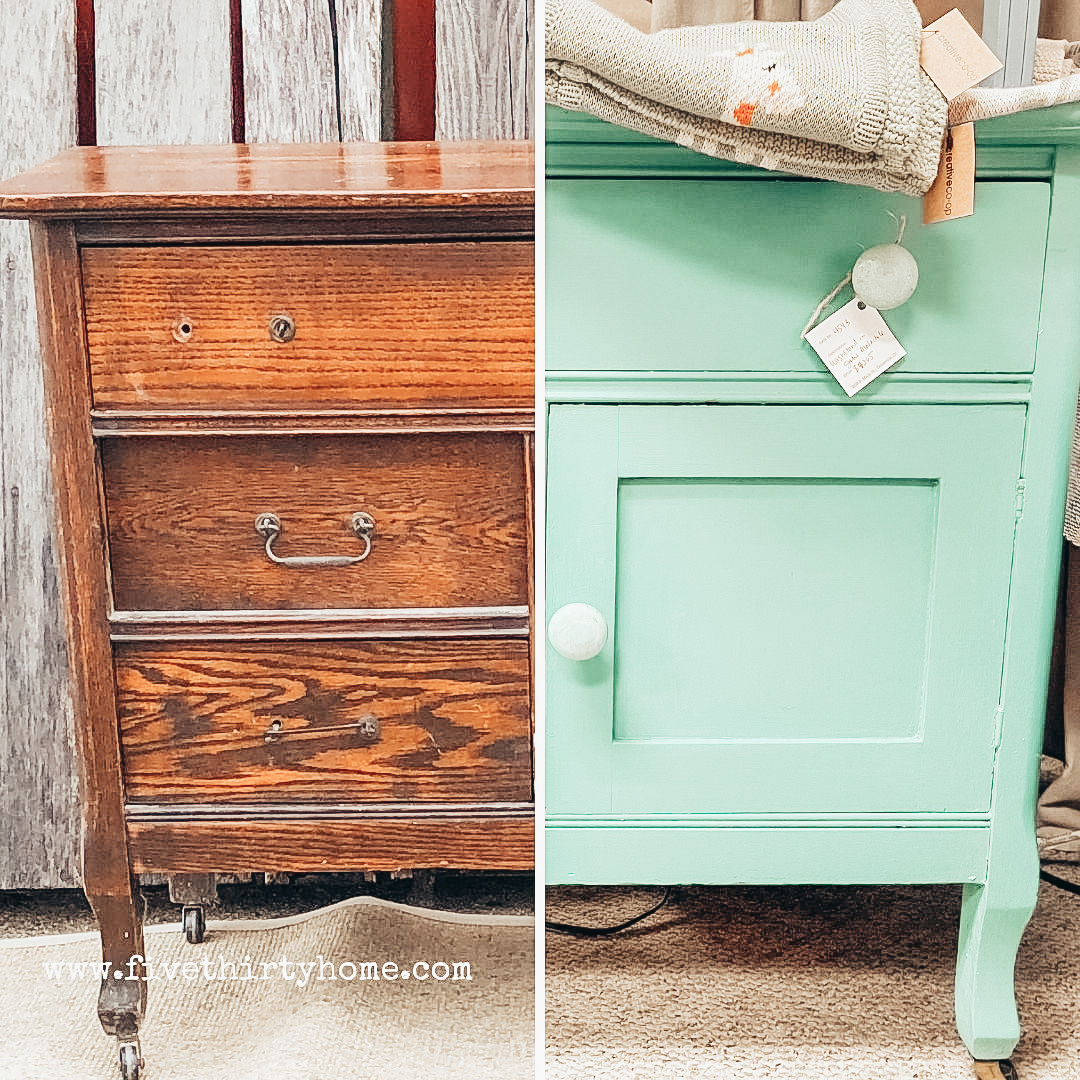
year of jolie: sage nightstand before and after

What do you notice first? For me, it’s the updated hardware using Jolie GIlding wax in Gold that pops off the Sage paint color. This piece would make a great bedside table in any room!
year of jolie: custom blue for a custom room
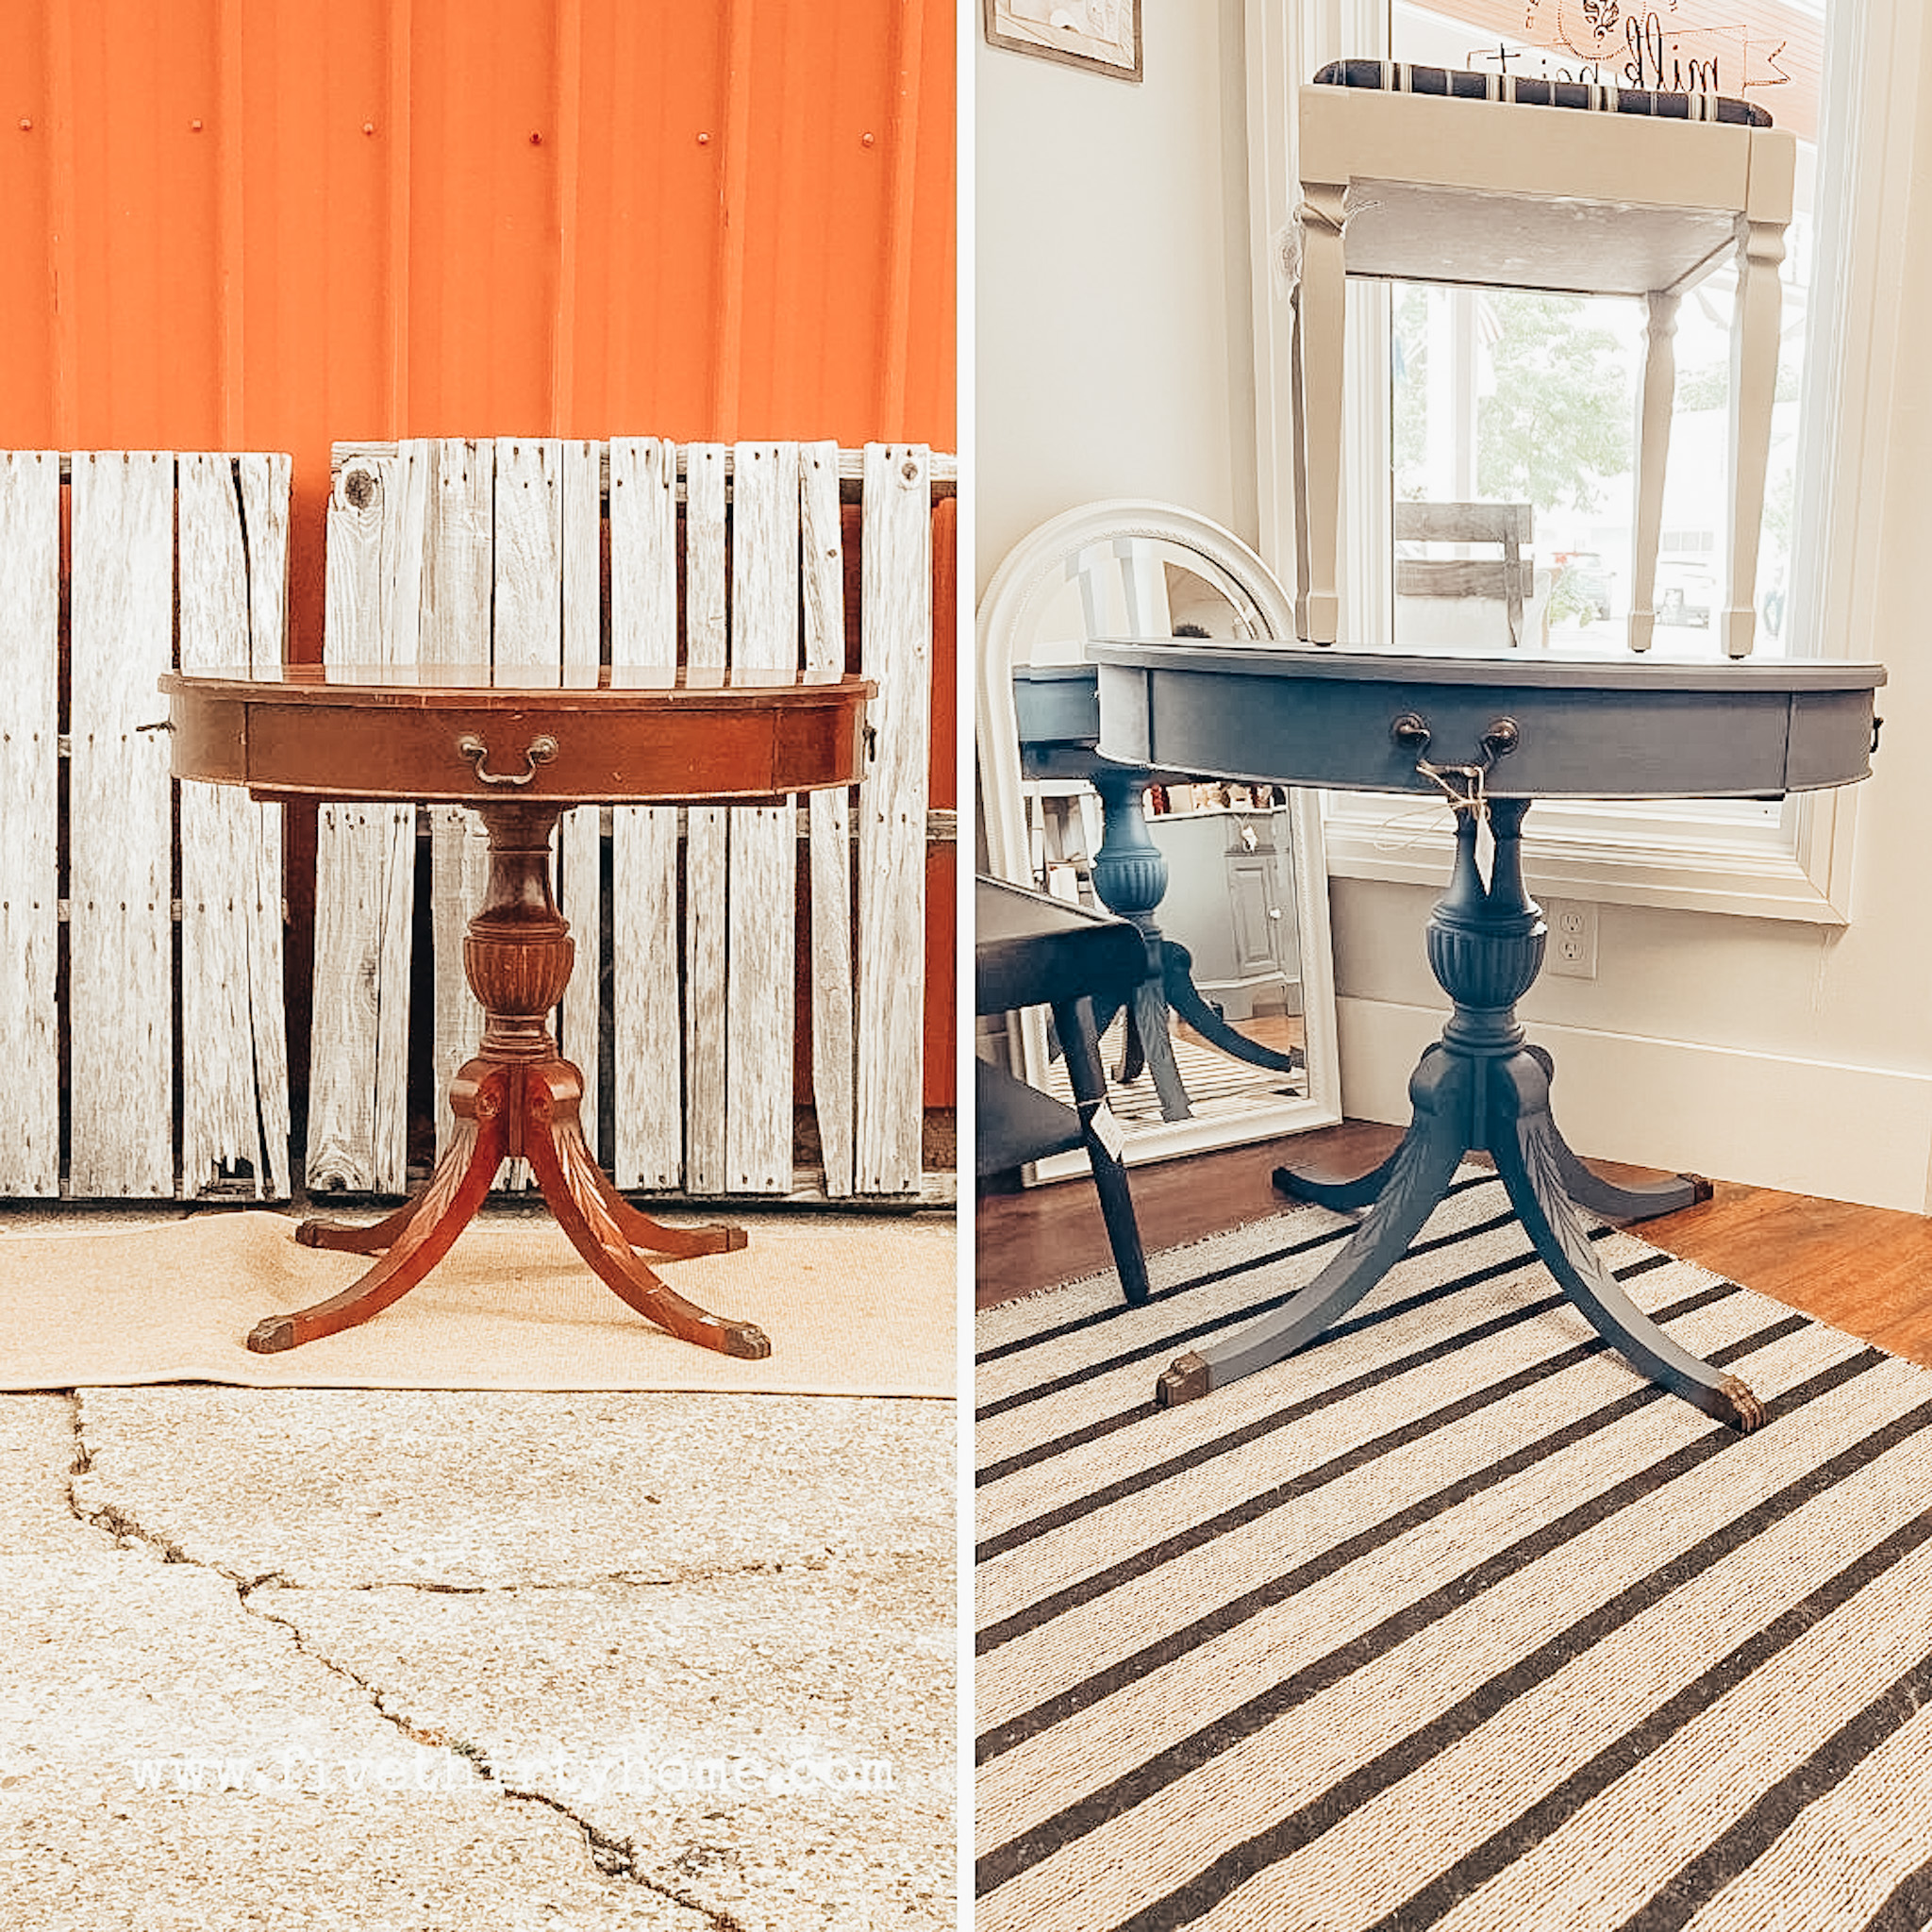
Mona and Erica found this color in the Jolie Color Fan Deck and immediately knew a project was on the horizon. This GIANT drum table fit the bill and then became a housewarming gift from mother to daughter! The color is an equal mixture of Jolie Paints in Gentlemen’s Blue and Classic Navy and we finished the project with two coats of Clear Jolie Wax.
before and after: this table has great lines
I love the versatility of this little table almost as much as I love the lines. Finished with two coats of Jolie in Legacy, it is perfect for any nook where you need a small table!

fivethirty at home: opening at new can of Jolie paint
How can you get the most out of your Jolie Paint? Start of the right way with shaking and stirring… Let’s stay connected! Check us out on social media and be sure to subscribe for all the latest updates, tips, tricks, and offers from Fivethirty Home.
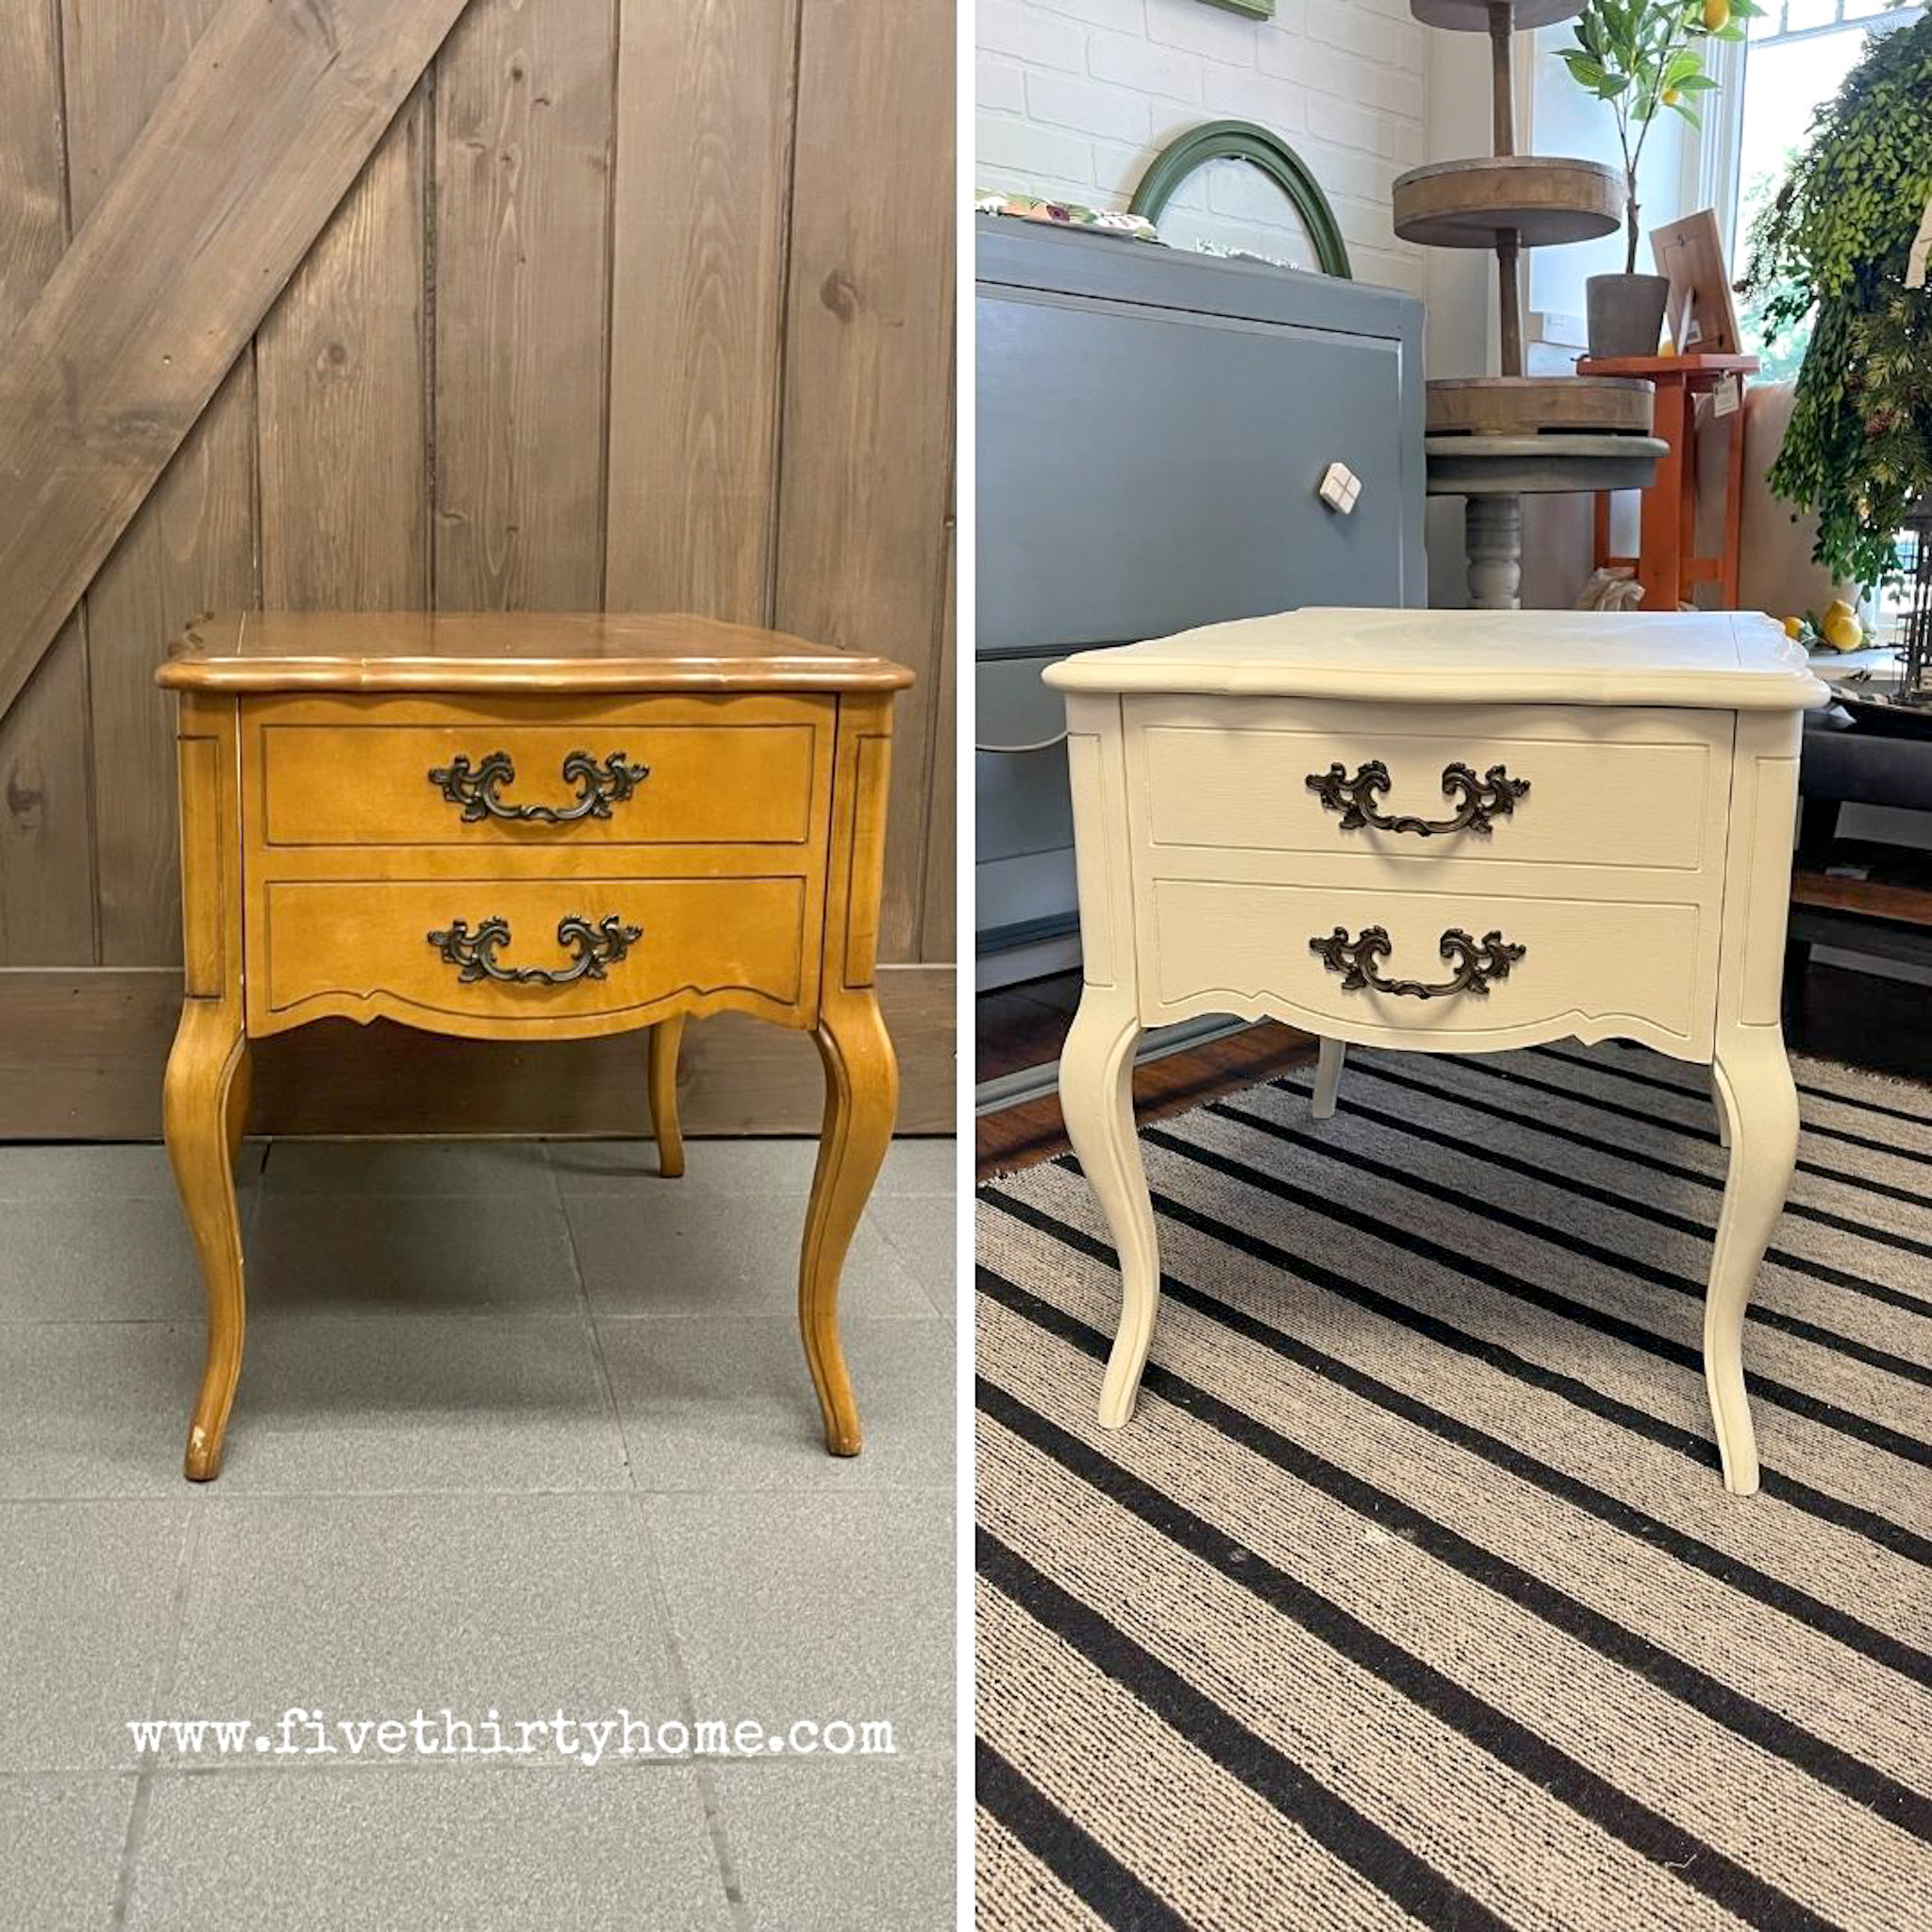
year of jolie; nightstands for a guest room
These beautiful french provincial nightstands were purchased from the habitat restore in zionsivlle and given a new life with two coats of jolie paint in antique white. Antique white is a great neutral for a restful, welcoming guest room – these are on the way to Florida for a customer’s second home.
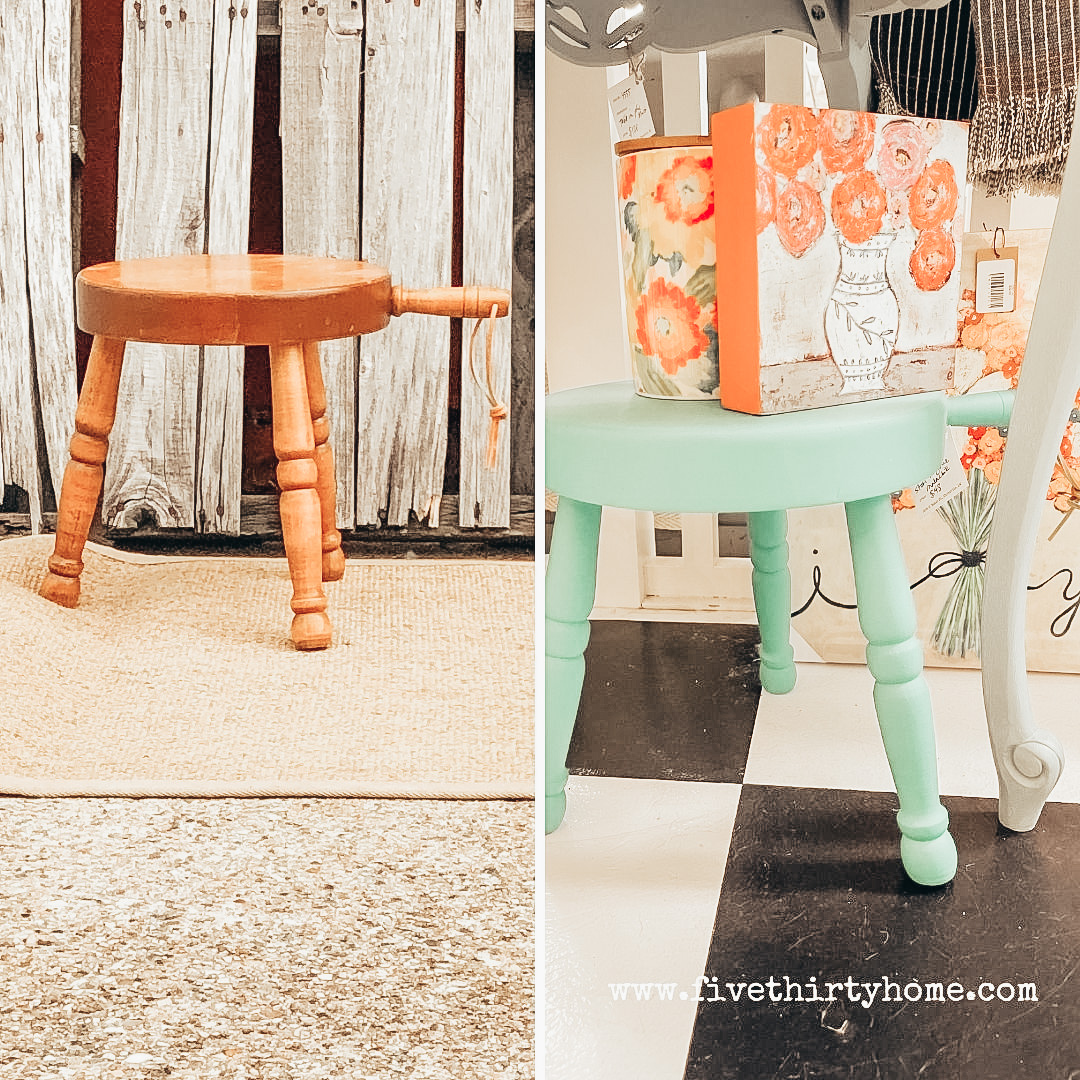
before and after: milking stool in jolie marigold
We found a few of these little milking stools at auction and they make the perfect little kitchen accent. Painted in Jolie marigold, this piece will add a little fun in any area! And it pairs well with all of our citrus kitchen goodies…

year of jolie: bedframe makeover by pretty distressed
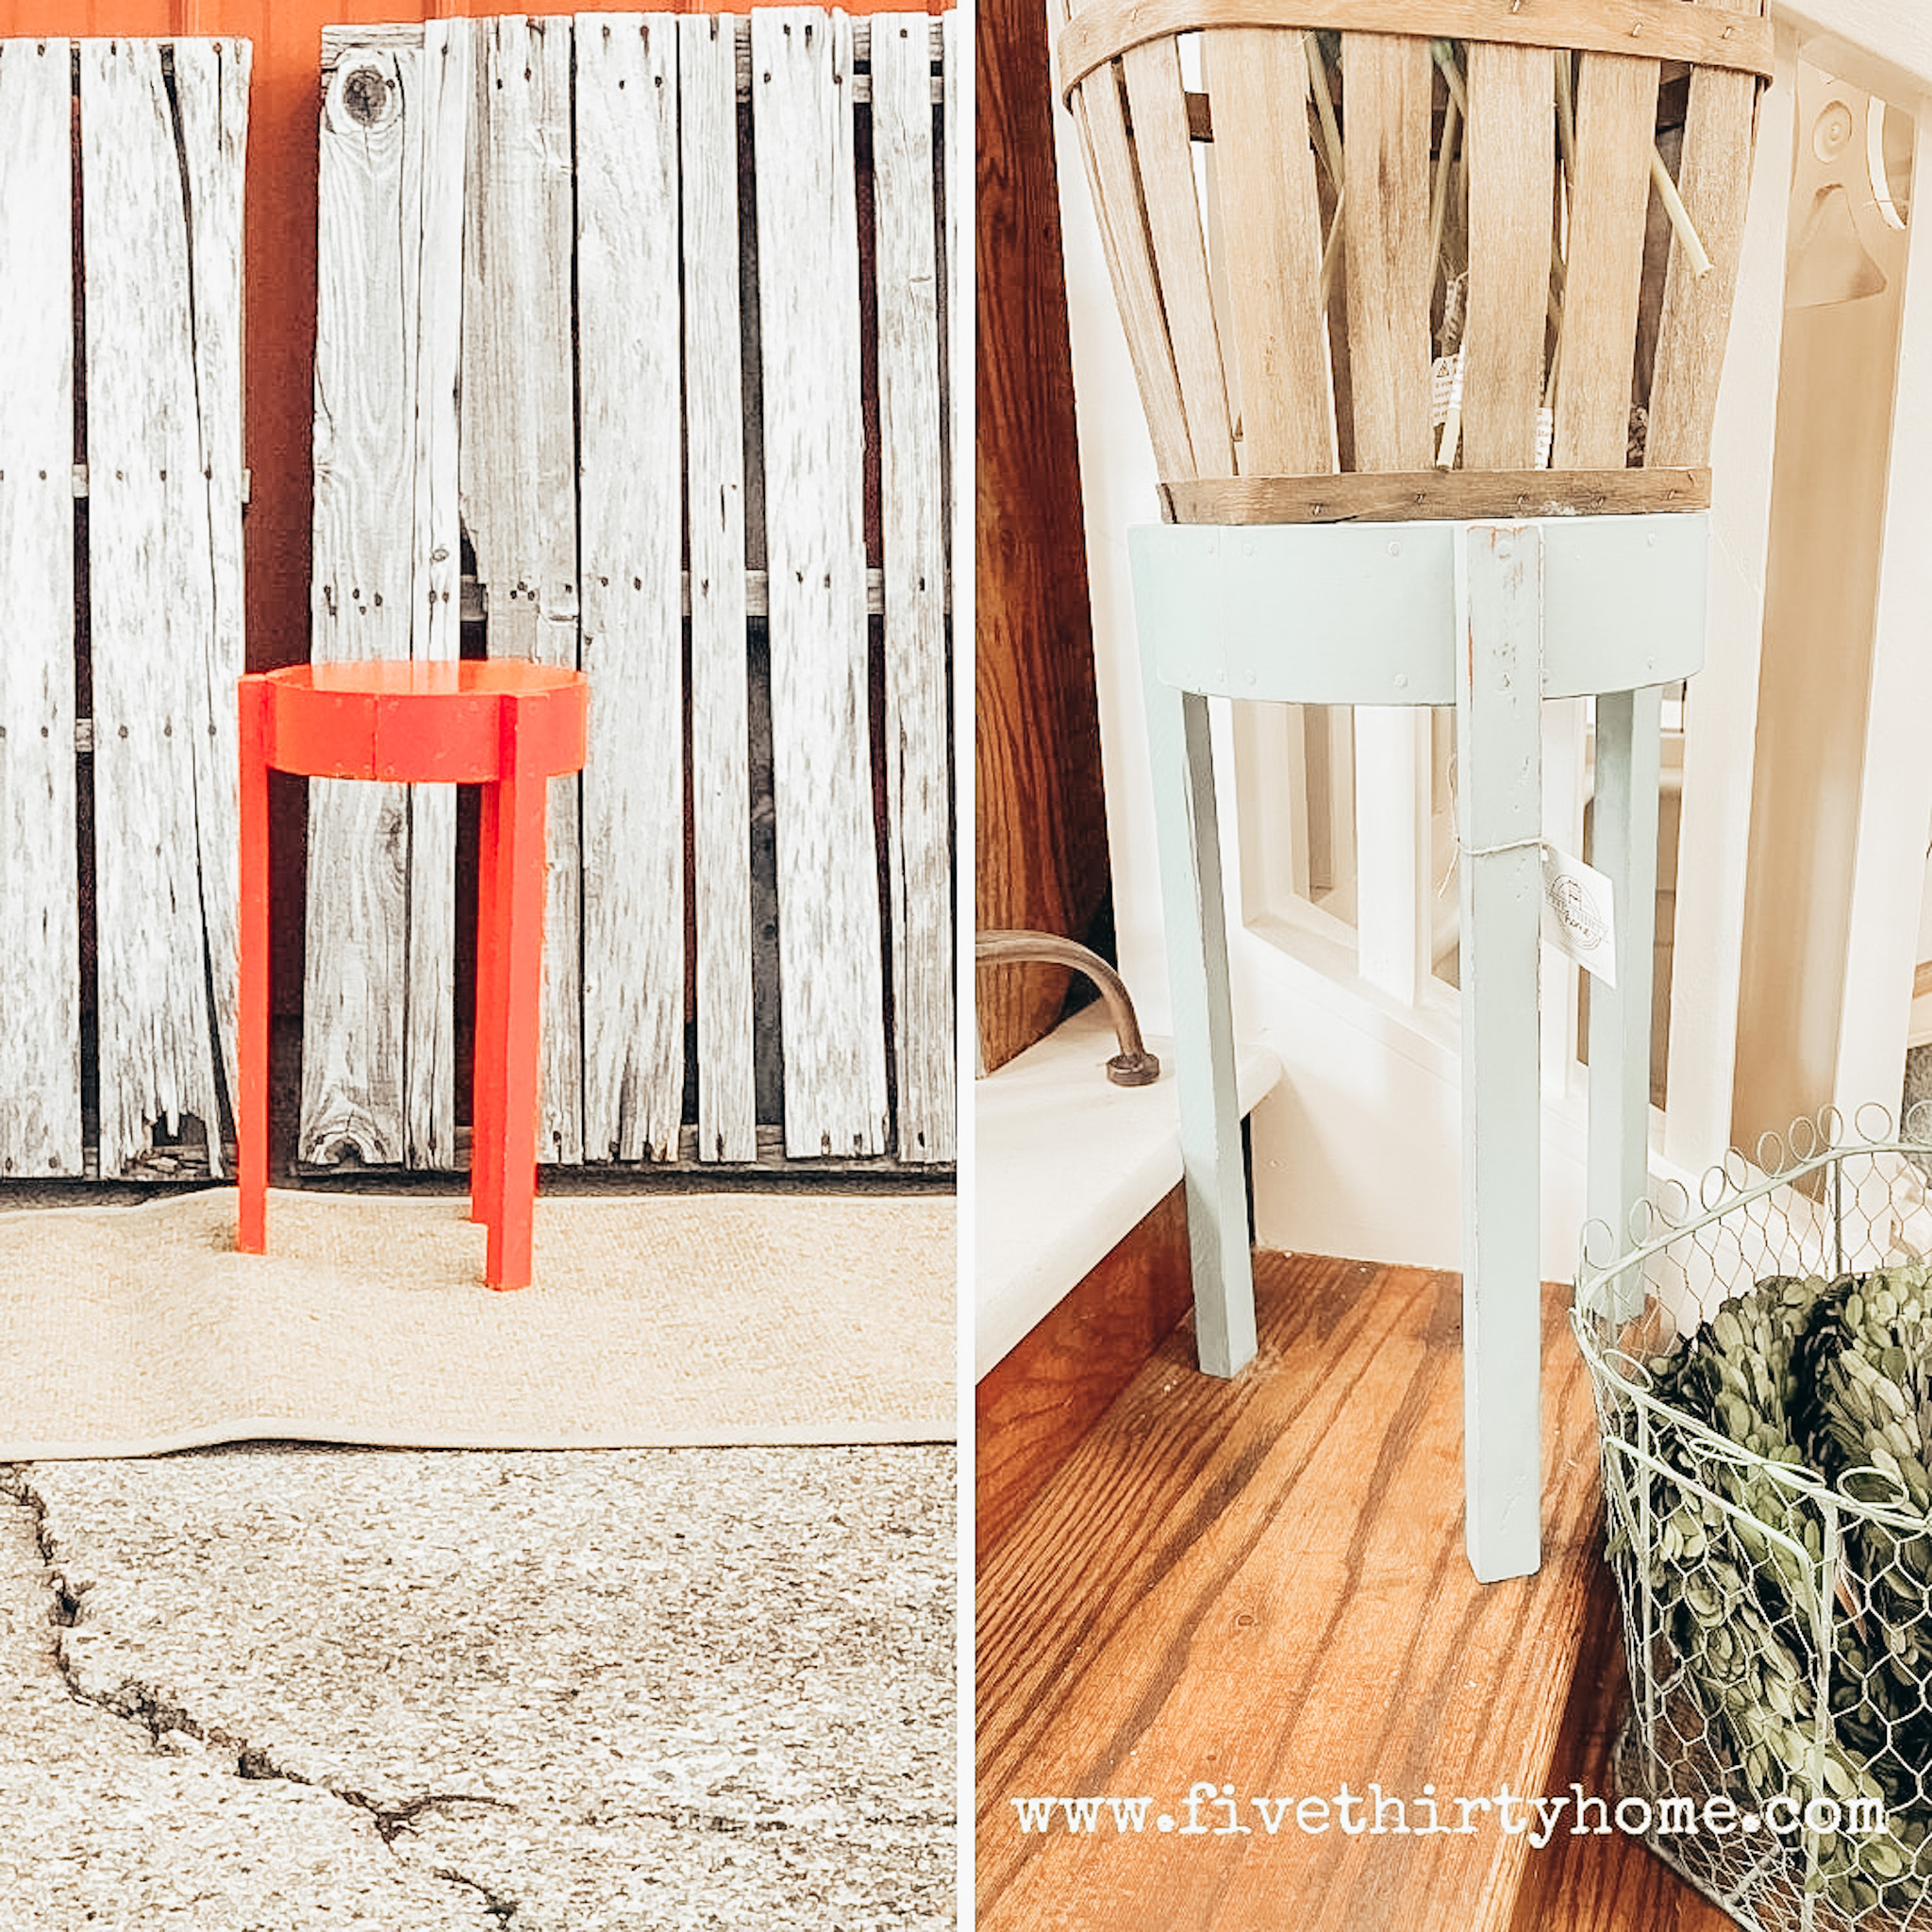
before and after: stool in Jolie misty cove
year of jolie: painting your fireplace, what finish and topcoat?
SOLID FINISH
This straight forward finish is a great option for those wishing for a total color change or a more modern look. We recommend applying 2-3 coats of a single paint using a Jolie Signature Brush for easy application.
WASHED FINISH
A washed finish is best for those who want to allow some of the original stone or brick to peek through. We find that layering two or three colors in varying tones works best for creating a more natural look.
Starting with your darkest color first, add a bit of water to the paint, brush it on using a Signature Brush, then wipe or blot off the excess using a clean rag. A terrycloth towel or painters rag will work best, as opposed to a paper towel. Continue these steps with the remaining colors, working your way from darkest to lightest and blending as you go. You can continue to spritz the surface with water as needed to help the paint settle into any hard to reach areas.
TOPCOAT
A topcoat is not required, however, if you wish to seal your painted finish, Jolie Finishing Wax or Varnish in Gloss or Low-Luster can be used. Keep in mind we do not recommend a topcoat for fireplaces where the surround experiences high temperatures, so you’ll want to test this out beforehand. Be sure to also check your local building codes for to confirm if there are any restrictions on painting near a firebox.
before and after: table in jolie lilac gray
I’m not a fan of purple. However, if you add enough gray (ahem, Jolie Lilac Gray), I’ll allow it!

fivethirty at home: jolie varnish
year of jolie: painting your fireplace, what color?
Typically, homeowners that are painting a stone fireplace are looking to tone down the existing color, either to make the material look more natural or to help the fireplace blend more seamlessly with the rest of the space. Because of this, we tend to recommend sticking to more neutral paint colors, such as whites or colors naturally occurring in brick or stone. However, it’s important for you to consider the style of your home and choose a color that complements your space and personal style, which could mean opting for more color. Below are a few of our go-to light neutrals, but we could see Noir, Linen or Legacy too!

year of jolie: painting your fireplace, what prep?
When it comes to painting your fireplace, there isn’t a whole lot of prep work required. Depending on the condition of your fireplace surround, you may want to begin your project by giving your surface a quick cleaning to remove any dust or grime. If you have soot that has accumulated over the years, use a degreaser to remove, then rinse well with water.
Right before painting, we recommend using a spray bottle to spritz the brick or stone with water. This will help the paint settle into any grooves or recessed areas, making the painting process go much more quickly. If working over a large area, you may want to work in small sections, spritzing and painting as you go.
before and after: jolie verdigris for a pop of color
All of these pieces were given a fresh coat of paint and a brand new look using Jolie Paint in verdigris…